Imgur – Register an Application
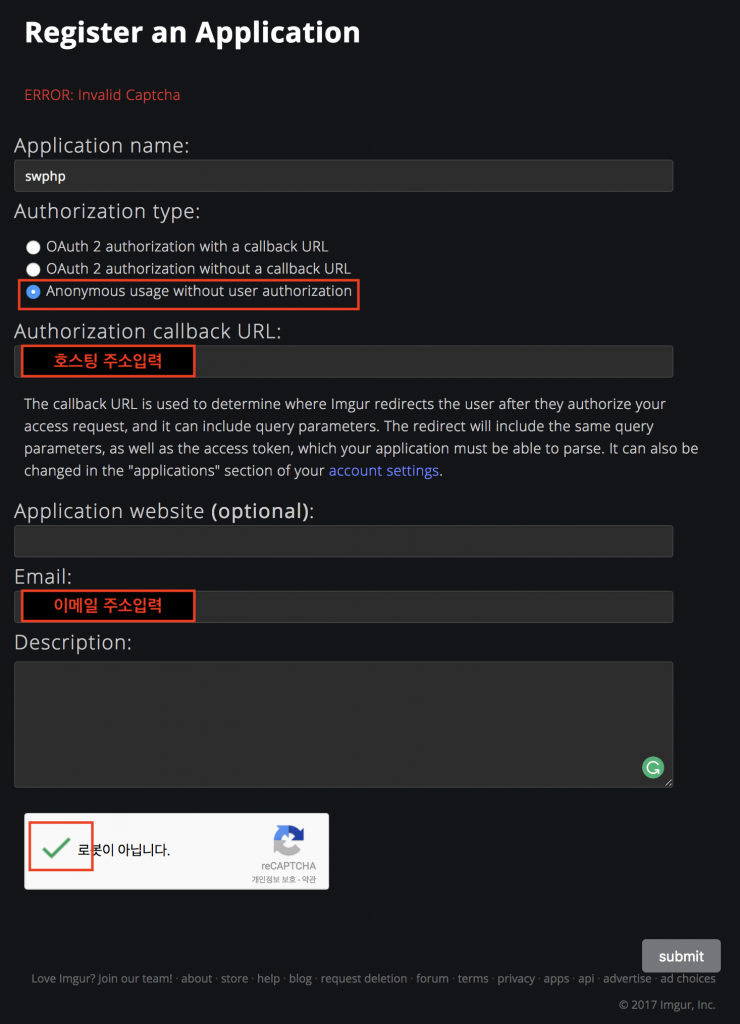
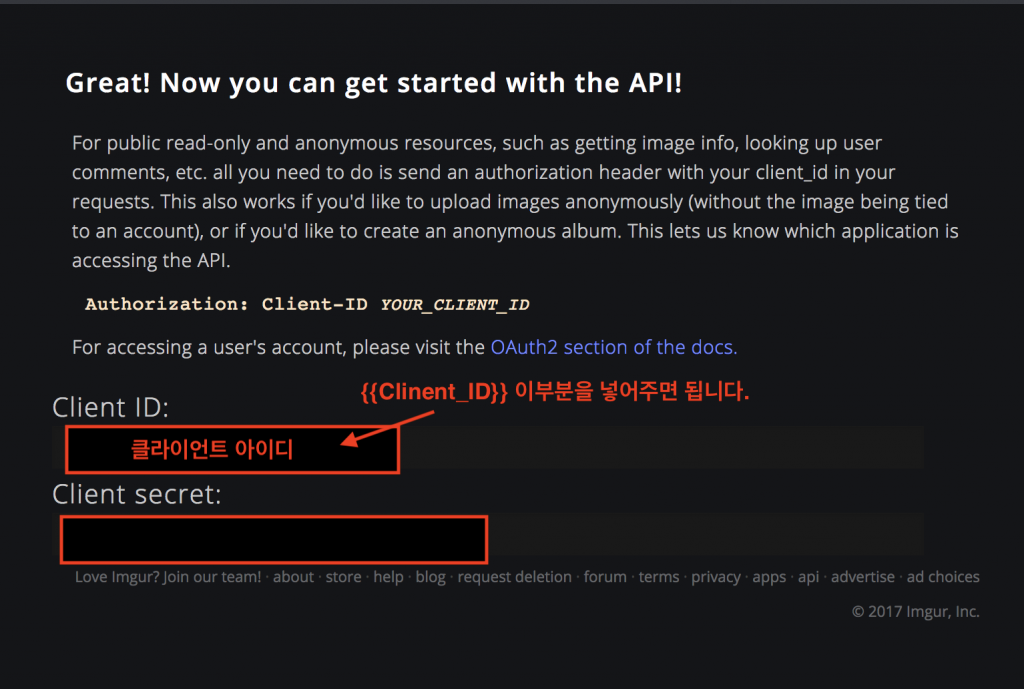
Application 등록 사이트


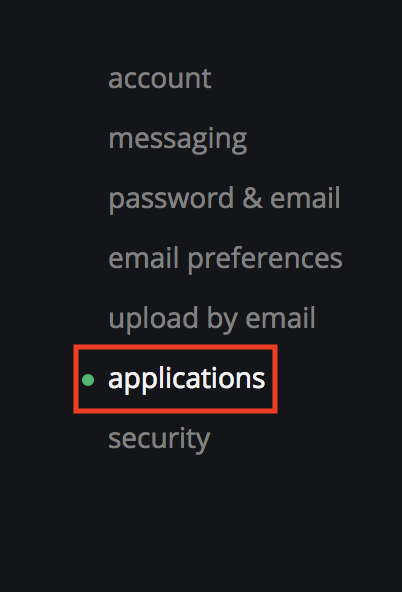
또는 상단 오른쪽에 아이디 버튼을 클릭하면 아래의 settings 메뉴를 이용해서 client id를 확인할 수 있습니다.


[imgur.js]
$(document).ready(function() {
 function uploadImageByImgur(file, callback) {
 var form = new FormData();
 form.append("image", file);

 var settings = {
 "async": true,
 "crossDomain": true,
 "url": "https://api.imgur.com/3/image",
 "method": "POST",
 "headers": {imgur.tar
 "authorization": "Client-ID {{Client_ID}}"
 },
 "processData": false,
 "contentType": false,
 "mimeType": "multipart/form-data",
 "data": form
 }
 $.ajax(settings).done(function(response) {
 data = $.parseJSON(response);
 var imgsrc = data.data.link;
 var $img = "<img src='" + imgsrc + "' alt='' width='100%' height='100%'>";
 $("#imgUploadWrap .imgBox").append($img);
 callback(imgsrc);
 }).fail(function() {
 callback("false");
 })
 }

 // 파일 변경시 uploadImageByImgur() 실행
 var imgLink = "";
 $("input[name=uploadImg]").change(function() {
 var file = this.files[0];
 uploadImageByImgur(file, function(res) {
 if (res != "false") {
 imgLink = res;
 $("#imgUploadWrap .btnBox").show();
 $("#imgUploadWrap").on("click", ".usebtn", function() {
 // alert(imgLink);
 $("form").append("<input type='hidden' name='imgLink' value='" + imgLink + "'>");
 $(this).hide();
 $(this).parent().text("위 이미지가 등록되었습니다.");
 })
 }
 else {
 alert("이미지 업로드 실패!");
 }
 });
 });
});
[form.php]
<!DOCTYPE html>
 <html>
 <head>
 <title>Image Upload Using Imgur API</title>
 <meta charset="utf-8">
 <script src="https://code.jquery.com/jquery-3.2.1.min.js"></script>
 <!-- imgur 이미지 파일 업로드시 필요한 js -->
 <script type="text/javascript" src="imgur.js"></script>
 </head>
 <body>
 <form action="process.php">
 </form>

 <!-- imgur 이미지 파일 업로드시 이미지 추가 부분에 이코드를 복사해서 추가하세요-->
 <div id="imgUploadWrap">
 <input name="uploadImg" type="file"/>
 <div class="imgBox" style="width:300px; height:300px; background:#efefef; margin-top:10px;"></div>
 <div class="btnBox" style="display:none"><button class="usebtn">사용하기</button></div>
 </div>
 <!-- 여기까지 -->
 </body>
</html>
[파일다운로드]


